

My Sourdough Recipe (step by step method with timing included!)
After years of tinkering and testing, I’m ready to share my sourdough bread recipe with you! This post is packed with info like exact timings for a bake day, all of the tools and ingredients you need, as well as ideas for using us your discard and more!
I’m a late trend-adopter. I watch other people test out something new and then once I’ve seen whether it works or not, I decide to hop in on it or abandon it.
Enter the sourdough craze during lockdown 2020.
I was firmly in the “I will never do this” camp and thought “why would I want to spend so much time on this?!” Sure we had all of the time in the world to do nothing during lockdown, but I had a toddler to run after, random coffee-date-work-zooms, and grocery staples to order for delivery three weeks before they’d actually arrive due to global shortages and shipping delays.
So mid 2021, I finally tried sourdough. After nearly everyone got into it and promptly abandoned it a few months later. I picked up starter from a neighbor in a Buy Nothing group and have been thoroughly enjoying the processes of making sourdough ever since.
I did a good amount of research, nearly chickened out, panic texted friends about how in the world to do it, and then finally tried a recipe that I didn’t love. So I tried again and liked it a little better, and tried another recipe and liked it a little better. Almost two years later I’ve finally found a recipe that I loved and tweaked it to make it my own.
This is what I present to you today.
Before we dive in, let me just say — sourdough sounds intimidating at first, but really it’s pretty simple once you get used to it.

Tools You Need to Bake Sourdough
Kitchen scale: I steal my coffee scale and it works well (and looks beautiful), but you can grab a more basic one like this. We will be making this recipe by weight in grams so this tool is essential.
Jars for starter & discard: use any wide mouth jar you have, but I highly recommend these from Weck. I’ll probably be ordering more soon.
Rubber spatula: this may be non essential, but I still find these to be the easiest tool to mix up my starter with.
Glass bowls: this recipe can be doubled, so find a medium and large size like these if needed!
Dough scraper: not entirely necessary, but definitely helps when shaping the dough. I prefer a plastic one (like these) for a little more flexibility, and a sharp edge for use in cutting if needed.
Bread proofing basket (banneton): the dough will rest in these in the fridge overnight to help maintain its shape. I bought this set of two for when I make a double batch.
Scoring tool (lame): not necessary, but if you’d like to make pretty designs on your loaf, these are fun to have on hand. The bread will naturally split when baking, or by using a lame, you can guide where the bread steams — resulting in a beautiful crust.
Dutch Oven: I like to use this ceramic pot from Caraway — it’s the perfect size for the loaf I bake, but they also carry a larger dutch oven. Any cast iron dutch oven should do the trick though!
Bread knife: this knife cuts fresh bread like no other. It’s not a strictly necessary tool but, boy, is it satisfying to cut your sourdough like butter.
Sourdough Ingredients
Making sourdough only takes a few key ingredients! Here’s what I use in mine:
Sourdough starter: if you don’t already have one, the best way to find some is from a friend! I picked mine up from a Buy Nothing group. If you’d like to make your own, give this recipe a try. Just keep in mind it takes a few days to fully ferment and be ready to use.
Water: I use filtered water for my recipe, but tap water works as well. Just know it might add a slight taste to the bread depending on how clean your tap water is.
Bread flour: The majority of flour used in this recipe is bread flour. Bread flour has a slightly higher protein content than all purpose flour, which makes for a stronger & stretchier dough. The final loaf will have good height & a tall, airy structure to it. I love using King Arthur flour products, so I usually try to buy this brand. If it is unavailable where I’m shopping, I try to grab another organic brand.
All-purpose flour: I add in a little bit of all-purpose flour to give a little bit of density to the loaf. The combo of both all purpose and bread flour makes for a strong but airy loaf that I am obsessed with. King Arthur flour is my go to again! Or whenever I do a Costco run, I buy their two pack of organic all purpose flour. We use a lot of flour around here!
White whole wheat flour: I only use a little bit of whole wheat flour in my recipe — this small amount adds a little bit of depth to the bread without making it overly wheat-y. I also tend to have a bag from King Arthur lying around or I pick up a smaller pouch from Thrive Market since I don’t run through a bag as quickly.
Salt: I only ever use Redmond Real Salt — it’s the best in my opinion!
Polenta/corn grits: grits are sprinkled at the bottom of the pot to help prevent sticking — Bob’s Red Mill is my favorite!

Alisa’s Sourdough Bread Method (with timing!)
I’m going to list out what to do with time stamps for an ideal sourdough bake day. Though admittedly, I’ve started sourdough way later than these timelines and gotten a decent loaf. So you do you. Or do this method. You choose.
8-9am: pull your starter out of the fridge and feed it. I weigh out 100g of starter in a new jar and add 100g filtered water and 100g all purpose flour. Mix it thoroughly — it will not rise if the flour is not fully incorporated. Cover with plastic wrap and place a rubber band around your jar, marking where the starter sits in the jar. Allow to rise in a warm spot in your house or your unheated oven with only the light turned on for 3-4 hours. This step should take you about 5-10 minutes of active work.
12pm: once your starter has doubled (per your rubber band measurement), it is time to mix your dough. Add 100g of starter to a large glass bowl (you will have some starter leftover which you can feed and use for another bake). Add your flour(s) and 75% of your filtered water for the recipe (about 250g). I usually add 300g bread flour, 150g all purpose flour, and 50g white whole wheat flour. You can play around with different amounts of each, but you should end up with 500g of flour in the bowl. Working with your hands, squeeze all of the ingredients together until a shaggy dough is formed. Add 50g more of water and squeeze to mix again. Allow dough to autolyse (rest) for 30 minutes. This step should take you about 10-15 minutes of active work.
12:45pm: after initial mixing and resting, add 10g of salt to your dough and remaining filtered water, about 50g. Mix the dough, using your hands to squeeze the mixture together until dough is smooth and free of clumps. Cover with a damp kitchen towel or plastic wrap and rest for 30 minutes. This step should take 5-10 minutes of active work.
1:25pm: begin stretching and folding the dough. Take about 1/4 of the dough and pull it up as high as it can go without breaking (usually 6ish inches out of the bowl), fold this portion into the center of the dough ball. Rotate the bowl 90 degrees and repeat with another 1/4 of dough. Do this a total of four times until each section of dough has been stretched and folded in on itself. Cover and allow to rest for 30 minutes. This step should only take 1 minute of active work.
1:55pm: complete a second round of stretch and folds. Cover and allow to rest for 30 minutes.
2:25pm: complete a third and final round of stretch and folds. Cover and allow to rise for 4 hours in a clean, well oiled glass bowl.
6:30pm: remove dough from the glass bowl onto a smooth (un-floured) surface. The dough should be slightly sticky, but should not need flour to help you in shaping it. Use a dough scraper if needed. Flatten dough to a rectangle about 12 by 18 inches. Fold the long sides of the rectangle to meet in the middle. Roll the short end of the rectangle in on itself. Keeping the dough on the flat surface, rotate the dough between your hands to create a round, tucking it underneath itself to smooth. Place in floured proofing basket, cover with plastic wrap, and let rest on the counter for 30 minutes. This step should take 5-10 minutes of active work.
7:10pm: place proofing basket in the fridge overnight for a 15 hour proof.
NOTE: At some point in between mixing the flour and putting the bread in the fridge, remember to feed your starter again and let it rise before you throw it back in the fridge. I use the same 100g water—100g starter—100g AP flour as stated above.
9:30am: place your dutch oven into the oven while preheating to 475 degrees F
10am: remove dutch oven from preheated oven and sprinkle about 1 teaspoon of grits/polenta on the bottom. Remove dough from fridge & proofing basket & place into preheated dutch oven. Use a lame to cut a large slit into the bread and make designs if desired (you can also skip this step — the bread will naturally split in the oven as steam is released). Place the lid onto the dutch oven and place in the oven. Bake for 25 minutes
10:30am: when your timer goes off, remove bread from the dutch oven and place directly onto oven rack. Place a wooden spoon in the door of the oven to allow some heat to escape (forgetting this step with burn the crust of the bread!). Continue cooking for 25 minutes.
11am: remove sourdough from the oven and allow to rest on cooling rack. Dive in as soon as possible! Sourdough is super delicious hot out of then oven.

My Favorite Ways to Enjoy Sourdough
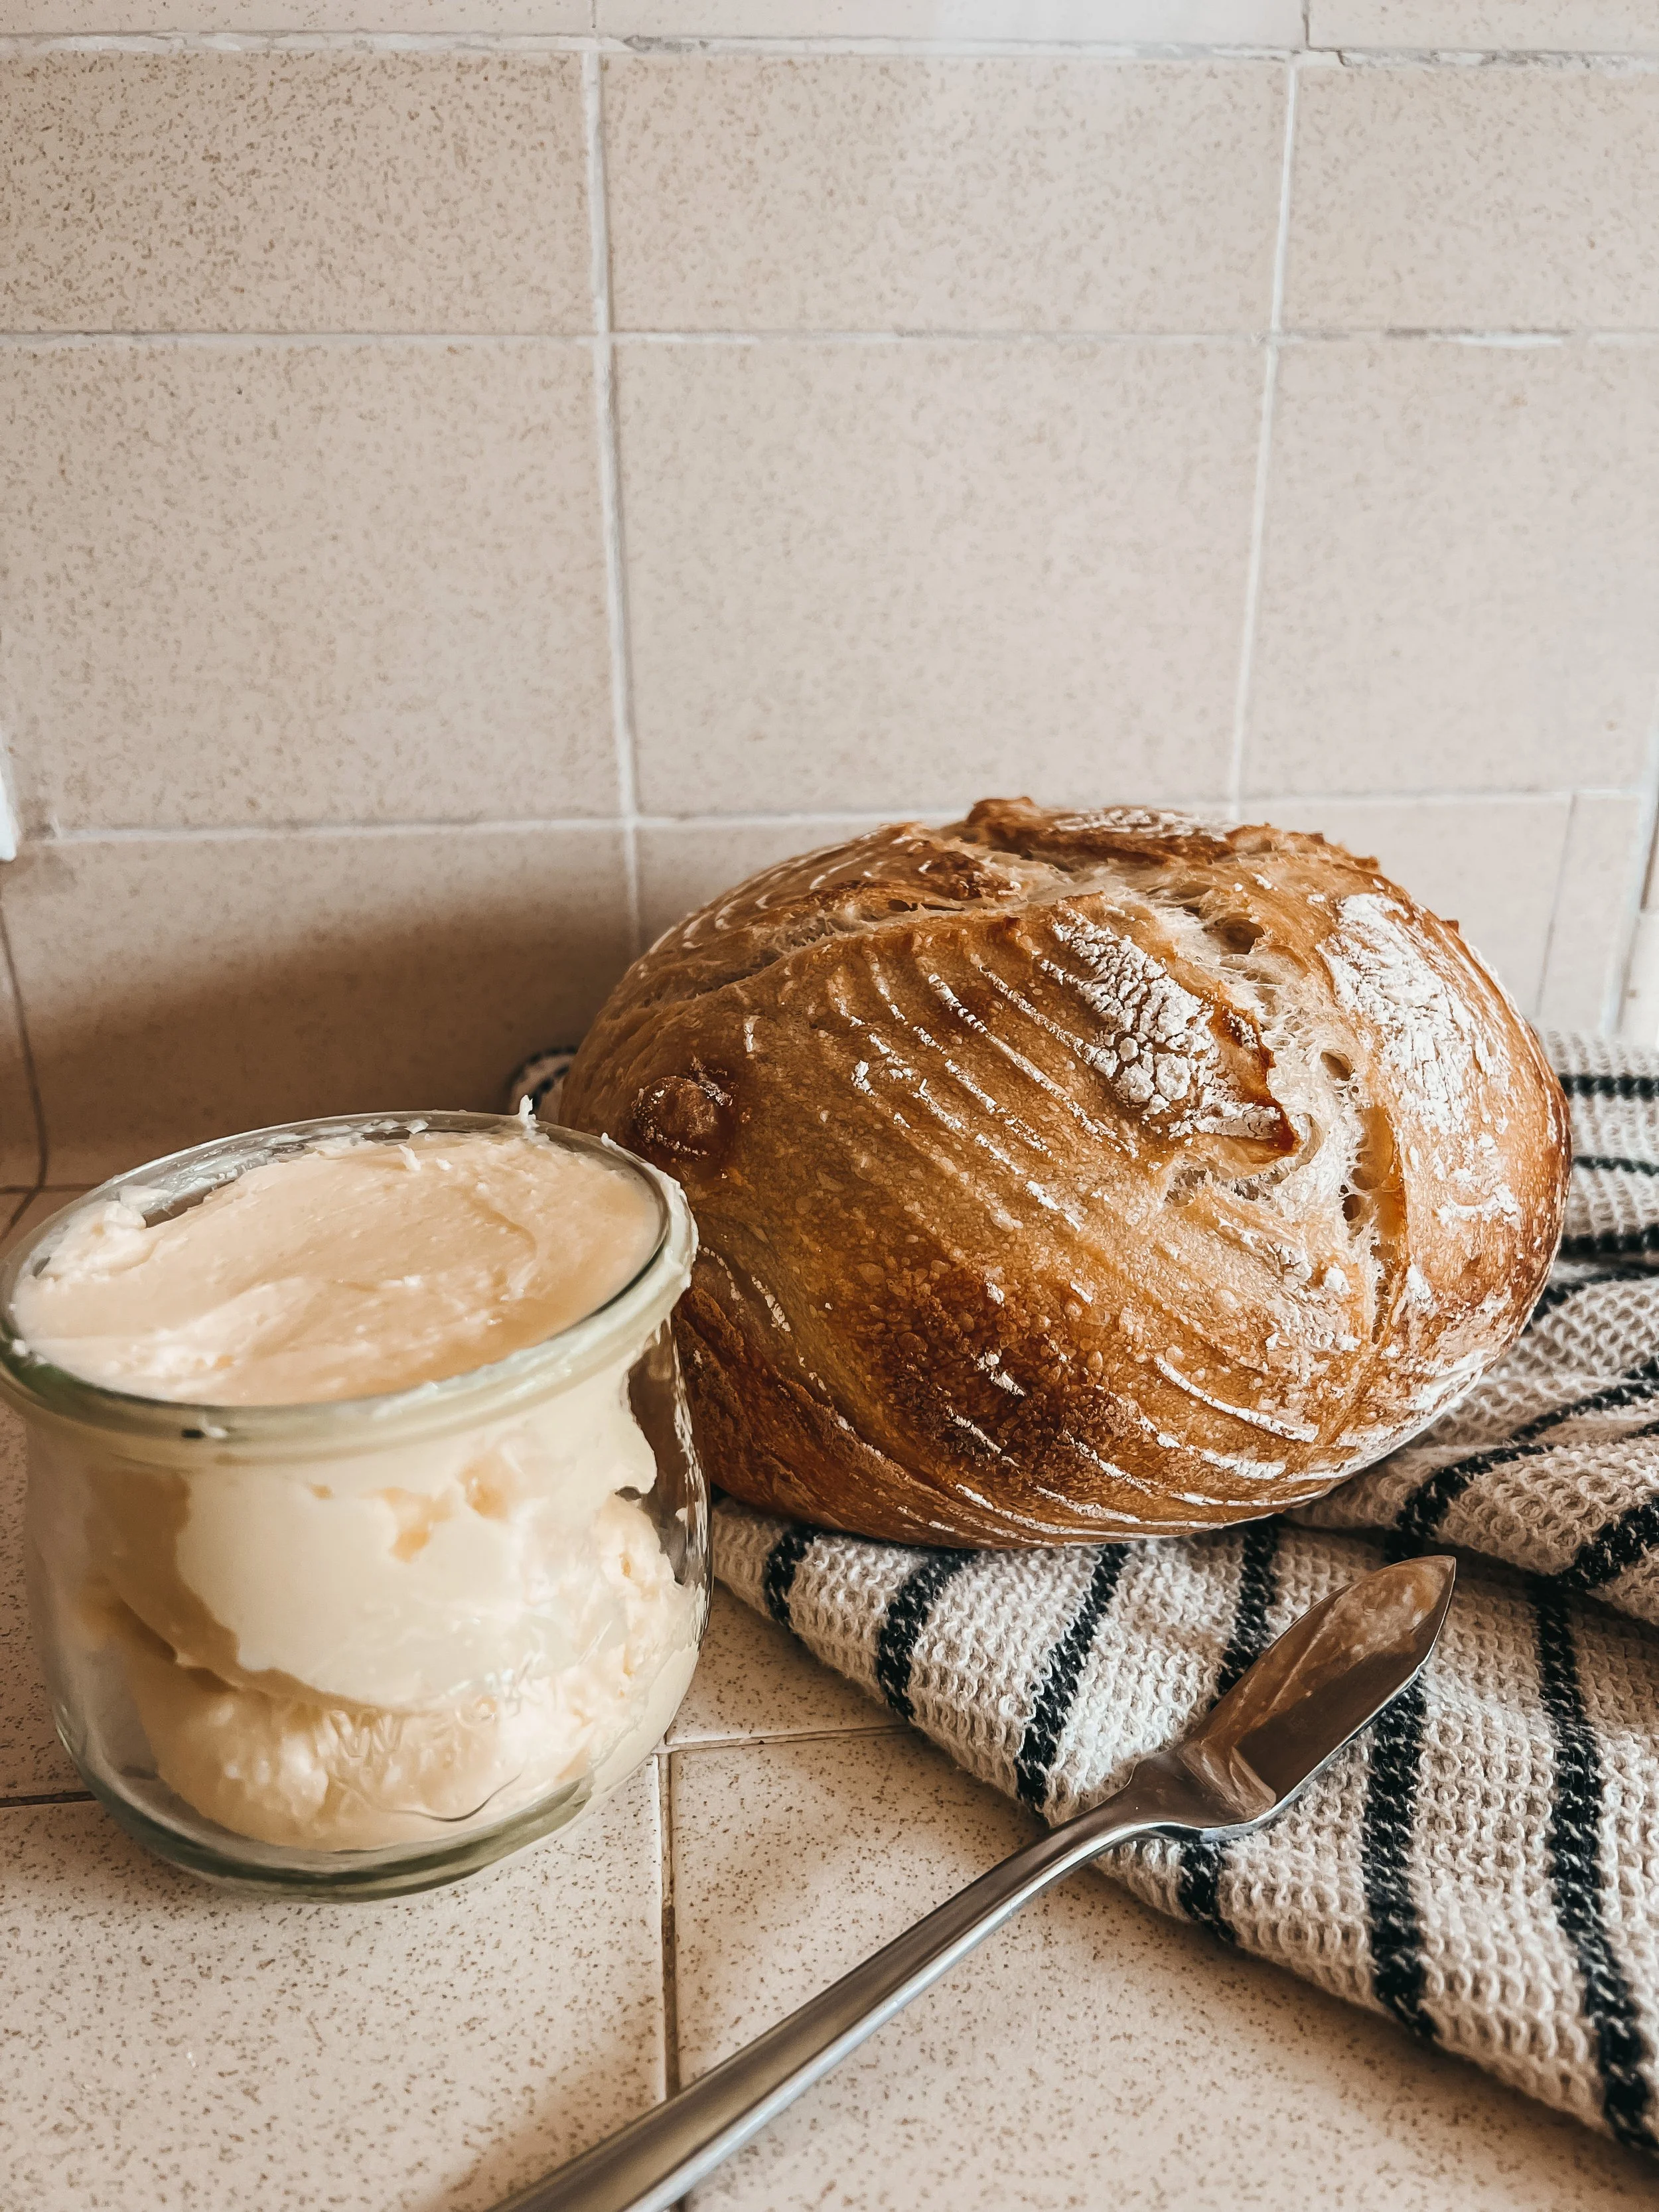
Eat right out of the oven with butter and flakey salt.
Make avocado toasts for breakfast/lunch. I like to top mine with pepitas, everything but the bagel seasoning, feta, and tomatoes.
Make a sandwich. I like spreading hummus and stacking with cucumber, roasted peppers, red onion, tomato, and avocado slices.
Make a grilled cheese. Enough said, right? Best with tomato soup IMO.
Toast into croutons. If your bread is starting to stale a bit, chop or tear into small pieces and cook on the stovetop with butter/olive oil and your favorite herb seasonings.
How to Store Sourdough
If you’re not eating it right away, store in a bread bag or box, away from direct sunlight. We usually wrap in plastic wrap to keep the bread from going stale quickly.
Slice and freeze in a bag in between pieces of parchment paper if you won’t be using all of the bread within 5 days.
My Favorite Ways to Use Up Discard
Sourdough baking naturally leaves a good amount of starter leftover (called discard). I like to collect this in a jar to use in recipes right away or throughout the week. These recipes don’t require the starter to be hydrated (risen), so they’ll usually include another leavening agent. But adding the sourdough to everyday recipes gives them that sour tang and added probiotic benefits of sourdough.
Here are some of my favorite discard recipes from around the web:
I’m always looking for more ways to use up discard! I’m currently tweaking my own cracker recipe and I have a pizza dough recipe and sourdough chocolate chip cookie recipe on my list to try next.
Thank you so much for taking the time to read through all of my sourdough tips! I hope your bread comes out beautifully! If not, try, and try again. It takes some time but sourdough baking is worth the effort in my opinion.

Homemade Sourdough Loaf
Ingredients
- 100 grams sourdough starter
- 340 grams filtered water
- 300 grams bread flour
- 150 grams all purpose flour
- 50 grams white whole wheat flour
- 10 grams salt
- Polenta (corn grits) for sprinkling
Instructions
- Feed your sourdough starter and allow to rise for 3-4 hours.
- When your starter has doubled in size, mix together 100 grams of starter with 290 grams of filtered water in a glass mixing bowl. Mix by hand until starter is dissolved in water.
- Add bread flour, all purpose flour, and white whole wheat flour to your bowl. Use your hand to squeeze together the ingredients for 3-5 minutes until a shaggy dough is formed. Cover the dough with a damp kitchen towel or plastic wrap for 30 minutes.
- After 30 minutes, add salt and remaining 50 grams of water. Use your hand to squeeze together the ingredients for 3-5 minutes until a smooth dough forms. Cover for 30 minutes.
- After 30 minutes, stretch and fold the dough. Start by pulling 1/4 of the dough up and out of the bowl as high as it will stretch. Fold into the middle of itself. Repeat 3 more times until all sides of the dough have been stretched and folded. Cover for 30 minutes.
- Repeat step 5 two more times for a total of three rounds of stretch and folds.
- After completing all stretch and folds, set the dough on the counter to rise for 4 hours.
- After four hours, turn the dough out onto a clean surface and shape your loaf. Stretch out the dough to a 12 by 18 inch rectangle, then fold the long sides in to meet in the middle. Roll the dough up into a log and turn in your hands until a round loaf shape in formed. Place into floured banneton, cover with plastic wrap, and allow to rise for 30 minutes on the counter.
- After 30 minutes, place dough into fridge.
- After 15 hours, preheat your oven to 475 degrees. Place your dutch oven into your oven while it preheats.
- Once oven has preheated, pull dough out of fridge. Remove the dutch oven from preheated oven and sprinkle polenta into the bottom. Place sourdough directly into dutch oven as score as desired. Cover with lid and place into the oven.
- Bake for 25 minutes.
- Remove loaf from dutch oven and place directly on oven rack. Stick a wooden spoon into the door of your oven and bake loaf for an additional 25 minutes.
- Remove loaf from oven and place on cooling rack until ready to enjoy.
Nutrition Facts
Calories
1923.6Fat
7.64 gSat. Fat
0.98 gCarbs
394.09 gFiber
17.09 gNet carbs
377.01 gSugar
1.4 gProtein
61.57 gSodium
3903.34 mgCholesterol
0 mg
Contemplative Prayer: Finding Rest and Direction
Valerie walks us through the practice of contemplative prayer.
I just recently finished reading Jan Johnson’s When the Soul Listens, Finding Rest and Direction in Contemplative Prayer.
Is rest and direction something your heart longs for?

As a Spiritual Director, I hear many different versions of the desire to find rest and direction. Overworked, overwhelmed and overspent are feelings that are all too familiar. Uncertainty, anxiety and decision fatigue weary our souls.
In her book, Jan describes contemplative prayer as “prayer in which we still our thoughts and emotions, and focus on God’s own self in an unhurried way”. As I read the description I am reminded how stillness and focus are so often lacking in our lives. Our world does not call us to rest. Many times physical rest is only a reaction to exhaustion. If we are resting our bodies, we are often not resting our minds but instead filling our minds with the images and noise of social media, news or entertainment. What about unhurried? Calm, peace and quiet often elude us. We are so busy achieving, producing, performing and experiencing that our lives feel more like hamster wheels or treadmills than actual living.
In contemplative prayer we are invited to slow down and rest and just be. In this practice, we are given space for transformation of the inner life. As our inner life is transformed, the outer world around us begins to have less of a grip on our lives. We can experience inner calm while living in a world that is going at a frenetic pace.
“To sit in silence before God restores the soul.”
If you would like to spend some time in contemplative prayer, below are some suggested ways to begin:
Plan on setting aside approximately 10 minutes to rest your mind and body.
Find a quiet place where you can be distraction free.
Choose a scripture verse, phrase or truth to meditate on.
Close your eyes and just be.
Allow distracting thoughts pass as you focus your mind on the things of God (scripture, verse, truth, character of God, etc).
Allow yourself to listen.
End your time with gratitude.
The above steps are meant to be a guide as a way to pay attention to God. It is meant to simply be a time to “quiet ourselves and simply enjoy God’s presence.”
Let us take steps to intentionally care for our souls, and make space for peace and joy at a deep and abiding level.

Valentine’s Gift Ideas
We’re rounding up some fun gift ideas for women, men, and kids this Valentine’s Day!
I love any excuse to celebrate love and to give gifts, how about you? Today we’ve rounded up a few ideas to gift your friends, significant others, and kids for Valentine’s Day. Check it out!

Citrus Body Bar - any bath essentials make fabulous Valentine’s and Galentine’s day gifts! We love this citrus bar from Beauty Counter! (if you don’t already shop with a consultant, please select Alisa Jeffus during check out! I’d appreciate your support!)
Gourmet Mexican Vanilla - this is hands down the best vanilla we’ve ever baked with! This gift would be perfect for the baker in your life!
Pajamas - always pajamas! Comfy, cozy, cute. You just really can’t go wrong with gifting yourself or your bestie with a pair of these ultra soft Valentine’s jammies.
Live-in tank - I bought myself this tank & high rise undies set years ago and I’m still obsessed with them! Classic cut, perfect for light weight jammies or to wear during the day/under your clothes.
Candles - I’m also a huge fan of gifting candles (and gifting them to myself too), I have my eye on this Palo Santo candle from Chalkfull of Love in their Valentine’s collection. Check out their mugs and other fun items too!
Romance novel - know a bookish gal who’s looking for her next book? Grab a fun romance novel! I’ve linked one of my favorites - The People We Meet on Vacation by Emily Henry. I’ve loved reading this author along with Taylor Jenkins Reid, Abby Jimenez, Carley Fortune, and Ali Hazelwood.

Valentine’s books - books about love, friendship, and sharing are always a great idea, and make the best gifts for kids this time of year. I created an idea list of my favorite PaperPie reads I think kids of all ages will love!
Pajamas - I love gifting my girls pajamas for almost every holiday. Its such a cozy way to celebrate! Our favorite, softest sets come from Plain Jane. We’ve bought multiple pairs for each girl now because we just love the quality!
Bath bubbles - in addition to pajamas, I also love gifting bubbles for every holiday! We’re big fans of Tubby Todd and love all of their scents. Bath bombs would be a fun gift too!
Butterfly wings - I love open ended dress up play and my girls love it to! Grabbing a toy where they can use their imagination is always a great gift! We love this one from Sarah’s Silks!
Kid’s garden bed - start the spring off right with this kid sized garden! They’ll have so much fun getting their hands dirty during planting, watering their plants, watching them grow, and then eating what they’ve grown!
Personalized puzzle - my daughter just learned how to spell her name and I know she’d love putting together this personalized puzzle all day long.

Ember coffee mug - we love this mug that keeps itself warm! Now his coffee will never get cold.
Comfy beanie - we love shopping Patagonia for their sustainability practices, so we always turn to them for outdoor gear and clothes. We love this one to keep your SO warm!
No bleed highlighters- is your partner an avid reader? These highlighters are AMAZING! They don’t bleed and come in aesthetically pleasing colors (read: not obnoxious). You have to check these out!
Gym equipment - support your guy’s fitness goals with these gym essentials or grab some equipment for a home gym! We love this brand!
We hope this list inspires you if you’re giving gifts for Valentine’s this year! Experiences make wonderful gifts as well, so if you’re going gift free, I hope you find a fun way to celebrate your love for your spouse, partner, friends, and kids!

Decluttering Your Inner Life
Valerie invites us into a simple reflection practice to declutter our souls.
Recently, here at Intentionally Ordinary, we have been doing some reorganizing and decluttering in our closets and kitchen drawers. We have been taking small steps that are making a big difference. At the end of last year, we were starting to feel those uncomfortable feelings that come from disorganization and clutter; feelings of frustration, irritation and annoyance, to name a few.
Just like external clutter in our homes or work environments can have negative effects on our lives, the same is true for internal soul clutter. Signs of soul clutter can include stress, worry, irritability, anxiety, depression and more (if needed, please see a medical professional if you are struggling in this area). Even if you are not experiencing any of these feelings, it is always a good idea to include soul declutter as a regular part of your soul care.

Here are some easy and practical steps for decluttering your soul:
Set aside a small chunk of time to spend in silence and solitude. Quiet your mind and body and allow yourself to pay attention to what feelings and thoughts surface.
Ask questions such as: Is there something that is bothering me? Someone I need to forgive? Something I need to give up? Something I need to change?
Invite Jesus into this time of searching and again pay attention to your thoughts and feelings.
End your time with space to just relax and breathe. So often our souls are in need of rest and time to just be without pressure or criticism. Allow yourself to relax and enjoy the moment.
Respond by writing down what you have discovered and make a plan. It is also a good idea to share with a soul friend to help you further process or provide accountability.
So often we just need to stop and pay attention. When we make this a regular practice, we will often find we are more at peace, more content and less overwhelmed by daily life.
Another great resource for soul decluttering is to meet with a Spiritual Director. As a trained listener, your Director can help you identify areas of your life that are disordered or unattended to, that cause feelings of distress or unease. It is also a time for you to receive empathy and clarity and rest for your soul.
Let’s be intentional to take small steps, together, towards happier, healthier souls!

Intentional Coffee at Home - Part 2: Making Good Coffee in a Coffee Maker
Learn all about the tools, processes, and techniques to make a delicious cup of coffee in your home coffee maker.
We’re picking up where we left off in our series, Intentional Coffee at Home. In Part 1, we covered a few of the basics like gathering equipment and sourcing great coffee to use at home (read it here), now we’ll focus in on:
Step 3: Practicing Good Technique

A coffee maker is one of the simplest ways to make coffee at home. And honestly, it doesn’t require too much technique. The best investment you’ll make with this method is in picking out your coffee maker. While there are many models on the market, there are a few that stand out for their treatment of the coffee during the brew.
A few years ago when I decided to get a coffee maker, I chose the Bonavita 8-cup coffee maker with a glass carafe. I chose the glass carafe simply for the look of it, but the model with the thermal carafe is a fantastic choice as well (in fact, it probably holds it’s temperature longer than the glass). The reason I chose this machine was not solely for the looks, but also for the way the coffee is brewed.
I was trained as a barista at a cafe that was known for its pour over coffees, so I learned to take a lot of care and use a lot of intention in making coffee. I wanted a coffee maker that would mimic the pour over coffees I was making every day at work. I didn’t want water to douse the beans and mess with extraction, I wanted a more methodical, careful automated pour of water over the coffee bed just like my pour overs I was making in the cafe. Back when I started as a barista, there weren’t too many coffee makers on the market like this. But since then, a variety of options have come on the market.

Choosing Your Coffee Maker
The Bonavita I mentioned earlier is a reasonably priced option for a coffee maker that closely mimics the pour over method. This machine allows for a bloom (we’ll discuss this more in part 3 of this series when we discuss making pour overs) and automates the water so that the coffee is evenly extracted.
There are a few other options for coffee makers I’d recommend, in case you’re interested in researching what might work best for your home set up. I love the look of the Ratio Brewer, but it is more expensive. And I’ve heard great things about this Oxo Brewer - it brews directly into the carafe which cuts down on heat loss which can occur in the other two brewers I mentioned.
Brewing Your Coffee
Coffee made with a coffee maker needs a medium-coarse grind setting. Looking at your grinder, move the dial a few notches away from the middle, toward the coarse setting. This brewer is resilient – it won’t take much trial and error to find a good grind setting. Always taste and adjust, but you may find that you enjoy the first setting you try.
I like to have 18g of ground coffee per 10oz cup, so a four cup brewer would need 72 grams of ground coffee (my 8-cup brewer makes 8 5oz cups of coffee, which equals out to 4 full 10oz cups of coffee - make sure you look at ounce measurements here instead of cups!). I list out measurements in grams, because for accuracy, we use a scale to measure out our coffee. If you don’t choose that route or don’t have access to a scale that weighs in grams, 18g equals out to a 1.5 tablespoons and 72 grams equals out to 6 tablespoons. I like this ratio for single origin coffee, but you may want to up the dose for coffee blends (try closer to 80g if you like it stronger!)
Now that our coffee is ground appropriately, we can brew our coffee.
The coffee machine doesn’t require too much technique, that’s part of what I love about it!
For an 8-cup coffee maker:
Weigh out 72 grams of your coffee of choice.
Grind at a medium-coarse setting.
Add 40 ounces of filtered water to the water tank on your coffee maker.
Place filter in the basket of your coffee maker & add ground coffee.
If available, bloom your coffee per the instructions on your machine.
Turn the coffee maker on to brew.
Once finished, pour coffee into your favorite cup and drink black or with milk!
My coffee maker offers different size brews, so I adjust this ratio for whatever I need (36 grams coffee to 20 ounces water, 54g coffee to 30 ounces of water). The same process applies!

Final Notes
A coffee maker is a pretty easy tool to use at home and it can do so much with so little effort! I love this method when I don’t want to spend as much time on my coffee or when I’m making coffee for a crowd. Figure out what you need for your desired home coffee station and play around with it until you find exactly what you like.
I hope this has been helpful in getting you started with your own home coffee station. If you have any questions about tools, ratios, or techniques, feel free to leave a comment or send me an email! I’d love to nerd out about coffee with you! Happy brewing!

An Invitation to Listen to God
Valerie invites you into a simple listening practice in your scripture reading.
Here at Intentionally Ordinary we believe in the importance of caring for your soul. It might sound daunting, but I promise it’s not another thing to add to your to do list. Rather, nourishing your soul is about learning together and taking one small step at a time. Soul care includes slowing down, observation, awareness and listening.
In my first blog post, Intentional Attention we explored paying attention as an act of love. In my second blog post, Reflection: a Spiritual Practice for your Soul, we looked at paying attention to your life as a way of loving and caring for your soul. Hopefully, you are beginning to see the importance of paying attention as a way of soul care — paying attention to what I give my attention to and paying attention to my life and what is happening in it.
I want to encourage us to be intentional in strengthening our listening skills as a way of paying attention. Each day, each moment, choosing to be intentional about listening as a way of caring for our souls.
Today I would like to share with you a way of paying greater attention to what we read in the Bible. This way of engaging with scripture is known as Lectio Divina. Lectio Divina is Latin for “divine reading.” I think it sounds really fancy but in fact it is simply a way of slowing down and paying attention to scripture as a way of listening to God. I like to think of it as a way that helps me pay attention at a soul level.
Before we begin, I just want to remind you that paying attention in our scripture reading happens in many different ways and that Lectio is just a tool to help us in that endeavor. It is a rhythm that has been nourishment for my soul, and I hope it will be the same for yours.
Pick a portion of scripture to read and meditate on. It can be anything, but I recommend something that is either already familiar to you or a portion that makes sense to read in a chunk (2-5 verses). After picking my reading, I like to take time to pray and prepare my heart and mind to receive from God.
The rhythm of Lectio is to read, reflect, respond, rest:
Read your chosen portion of scripture.
Pick out a word or phrase that stood out to you and reflect (meditate) on that.
Read your chosen portion a second time and offer a prayer to God regarding the word or phrase that stands out to you.
Read your portion a third time and then rest (contemplate) and consider what is God’s personal invitation to you from the Scripture or simply spend some time in quiet rest, enjoying peace and calm.
If you like to journal, this is a great time to write down what you learned during the exercise. Recently, I Lectio-ed my way through the book of Romans and it was so fun and interesting to read my notes when I was done. This was a process that was slow (several months) and intentional and nourishing to my soul. I loved it so much that now I am popping over to the book of Philippians!
If you want more information or more direction, here is a link to a Lectio Divina guide with over 50 Scripture portions along with guided questions and prompts.
Here’s to listening well on our journey!

Reflection: a Spiritual Practice For Your Soul
Valerie shares her journey with reflection and some benefits of this spiritual practice.
I wasn’t paying attention. How many times have you heard that? Said that? It’s a common phrase to say or hear and I might even suggest that it is a perfectly fine thing to say. We understand it when someone says it — because we’ve all done it. We’ve all failed to pay attention at one time or another.
In my previous blog post, “Intentional Attention” I briefly explored the connection between attention and love. My suggestion was that the intentional giving of attention was an expression of love to others. Here, I would like to explore the idea of paying attention through reflection as a way of loving and nourishing your soul.

Reflection is a normal part of our human experience but comes in many different forms and expressions. It’s not unusual for someone to ask, “How was your day?”. To answer that question we need to reflect or think back on the events of the day. Reflection is unique to each person. Some people would say they reflect a lot. I have friends who say they are almost constantly thinking about how an event in their day played out and how they did or didn’t perform. I have other friends who when you ask them questions that require reflection will almost certainly reply, “I don’t know.”
The intention and purpose of the practice of reflection is to nourish your soul. It is not important whether you are naturally good at it or not.
About two years into my spiritual direction journey, reflection became my friend. At that time, I was in a monthly spiritual direction group with two strong, grounded Christian women whom I greatly admired. When they spoke, I paid attention. In this particular session, both of the women shared stories of recent events in their lives. Each woman — separately— mentioned the inclusion of reflection in their stories. The word caught my attention and I felt a Holy Spirit nudge to investigate this more.
Immediately upon finishing the session, I hopped on Google and searched “reflection for Christians.” The first thing that popped up was a familiar name and title, The Next Right Thing Guided Journal by Emily P. Freeman. I had been listening to her podcast on and off over the years and had also read one of her earlier books, Grace For the Good Girl. So, I did the “one click” checkout on Amazon and the guided journal was on its way.
That happened less than two years ago, and it changed my life.
The Next Right Thing Guided Journal helps me be intentional about using the practice of reflection. This spiritual practice helps me pay attention to my life and what God is doing in it. I like what Emily says in the beginning of the journal,
“The practice of looking back and paying attention serves as an anchor for the soul in a fast-moving world. Instead of waiting for the world to stop so we can catch up, we slow ourselves, look around and name what we see.”
This guided journal is arranged to be used for one year and you can start at any time. I use it weekly for just a few minutes each time. Because of the way it is formatted, I am able to go back and read over my entries as a way of remembering what I have been learning each week, month, and season. If this sounds interesting to you, please check it out here. Do some exploring and you will see why this book is listed as one of the items on our Resources for Nourishing Your Soul blog post. Alisa also loved the book with the same title. In fact, she listed it as one of her favorite books of 2022!
If this journal isn’t for you, there are many other ways to practice reflection.
Here are a few:
*The Prayer of Examen — here is a link to an article from Soul Shepherding explaining how to use the prayer of examen and its benefits.
*Reflection by journaling — if you already journal, this may be a great idea for you. You can practice reflection by going back in your journal and highlighting things like answered prayers, challenges, life-giving events and life-draining events, or simply highs and lows.
Speaking of highs and lows, this is one way we have been using reflection during our Sabbath dinner —
*High, Low, Buffalo — on Friday nights, after our Sabbath meal, we will often go around the table and listen to each adult share the highlight of their week, the low point in their week and something surprising (Buffalo!) that happened during their week.
Reflection can be fun or serious but most importantly it can be nourishing to your soul. Here are some of the ways reflection has benefitted me:
*Lessening my anxiety — by looking back on the good things and the God things, it helps my brain move away from anxiety-producing thoughts.
*Identifying positive and negative patterns in my life — when I can identify these patterns, it helps me to be intentional to choose life-giving activities and make changes regarding life-draining activities.
*Becoming more aware of God’s presence — when I am being intentional to look back over my days, weeks, and months through the lens of what God is doing in my life, I am able to feel closer and more connected to Him which is also a great source of inner peace and comfort.
Each of our souls are invaluable and in need of attention. I hope you will consider the simple practice of reflection as a way of loving and nourishing your soul.

Intentional Coffee at Home Part 1: Setting Up Your Station
Learn the initial (simple, but important) steps it takes to make delicious coffee at home.
Today I’m sharing some easy tips to implement making delicious coffee at home! I’ve been a barista for over six years now and I’ve discovered some key factors to up your coffee game at home.
We believe in bringing intentionality to everything we do and that can be as simple as starting with good coffee! Slow down, create with care and precision, and then savor and enjoy. While some days call for a quick coffee while running out the door, I hope you’ll join us here at Intentionally Ordinary by waking up a few minutes early and savoring your delicious cup of freshly ground, freshly brewed, homemade coffee before you start your day.

Step 1: Source Good Coffee Beans
A lot goes on behind the scenes to get coffee to our homes, so I like to be intentional in choosing beans that support farmers, businesses that put a lot of thought and care into their coffee, products and equipment that make the coffee delicious, and processes that will result in a delicious product to wake you up in the morning.
Coffee is so fascinating, and I’m tempted to give you quite the run down about how coffee is grown and sourced. But I’ll keep it short. Coffee grows on trees in a cherry like fruit in regions around the world, but primarily in Central and South America and in Africa. The beans are harvested from the cherries and washed or dried, then packaged up and shipped to coffee roasters in your neighborhood, across the country, and all over the world. Coffee roasters turn this little green seed into the coffee beans we know and love through a detailed process of heating and cooling to achieve optimum flavor. The roasted coffee is packaged up and delivered to the grocery store, your local shop, or shipped to you. Even though this is an abbreviated version of coffee’s journey, you can see it takes and immense effort to arrive at coffee’s final form.
There are so many people involved in this process and in recent years the specialty coffee industry has highlighted individual farms that are caring for the coffee plant with intention. Because of this highlight on high quality beans, specialty coffee shops also strive to treat the coffee with intention and use products and processes that make these coffees shine.
As an experienced barista, I also want to bring this intention home with me. Many may treat coffee as a vehicle for energy, but for me coffee is meant to be delicious on its own, enjoyed with good friends, or savored in a quiet moment.
Our lives move at a frenetic pace in the modern age and I’m beginning to see the value in slowing down to not only be intentional with where we get out coffee and how we make it, but also in how we spend our moments drinking it.
So our first step to making intentional coffee at home is to source good coffee beans.
Here’s what I look for to know that a roaster cares about where its beans come from: bags are sold in whole beans, bags list country of origin and the name of the farmer/farm, bags list tasting notes, and beans are roasted “medium”. This has some exceptions and I’m sure there’s delicious coffee that doesn’t fall into these qualifiers, but for me this is a baseline evaluation of if I can trust the roaster to make a good product. If the company truly cares for its coffee, it should be highlighting these features in a majority of these products.
I highly recommend doing your research and finding a local roaster near where you live. There are some bigger companies that I would recommend like Blue Bottle, Verve, and Stumptown as starting points. These companies might be available in your grocery store. And of course so many amazing small roasters are accessible online. I love Heart, Good Coffee, Be Bright, Go Get ‘Em, AndyTown, and Saint Frank, just to name a few. But, if you live in a town that has a local coffee shop or even coffee roaster, I’m a huge advocate of supporting local.
Once you’ve researched and sourced delicious whole coffee beans, roasted from companies that seek out high quality beans from intentional farmers, you’re ready to gather equipment to make that coffee shine.

Step 2: Purchase High Quality Equipment
There are so many products on the market that all claim to make great coffee. I’m sure many of them do, but part of living in an intentional home is only bringing in the items that are necessary and serve you and your goals. I encourage you not to get swept up by the latest new thing, simply invest in the product that will help you make fantastic coffee.
Start by evaluating what kind of coffee you want to have at home – drip coffee or espresso are the primary methods. Do you want to serve coffee to a crowd? You’ll need larger carafes to do so. Is the coffee just for you? Smaller equipment will be sufficient here.
Once you’ve evaluated your needs and your ideal set up, it’s time to purchase essential equipment. Regardless of the brew method you land on, I recommend buying a burr grinder and scale. These can be purchased at varying price points, so I’ll link one inexpensive grinder here and a pricier option here. The primary component you’ll need in a grinder is burrs – blade grinders do not produce an even grind and should not be used in making quality coffee. A kitchen scale can suffice for measuring your coffee, but I highly recommend a scale with a built-in timer if you’ll be making pour overs– here’s an inexpensive option and a splurge option here.
If you’ll be primarily making espresso, I recommend Breville products – the espresso machines come with all the equipment you’ll need like a tamp and a milk steaming pitcher. The machine is easy to program and makes delicious espresso without too much experimentation. I have this model, but there is also a larger version that comes with a built-in grinder (here’s that link). Evaluate what space you have, and which one works best for nourishing your beautifully ordinary life.
If you love the convenience and size of a coffee machine, there are multiple options on the market that make exceptional coffee. I use this one, but I’ve heard amazing things about this one. Both brew large batches of coffee, so they’re perfect for a crowd, but also have some cool features that allows for careful and precise brewing.
And finally, if you’d like to try your hand in pour over coffee, you’ll need to source a few different items. I highly recommend a goose neck kettle and for convenience, an electric kettle that heats water is a huge time saver. I have this one and I love it. You’ll also need your pour over dripper. My favorite dripper is flat bottomed (as opposed to cone shaped) and you can find it here. For larger groups I like to use a Chemex – it can hold up four large cups of coffee!
Step 3: Learn the Process
Your coffee is in hand, your equipment is ready to go – next we’ll learn about technique.
Each brew method can be pretty detailed, so I’m going to split these posts up to make the information easier to digest.
So stay tuned for part 2 - brewing good coffee in a coffee maker, part 3- making pour over coffee, part 4- making espresso, and part 5- steaming milk. It’s going to be a fun journey, so check back on the blog for each part!

Intentional Attention
How are love and attention connected? Can we be intentional with where we are giving our attention?
““The first act of love is always in the giving of attention.” ”
Have you ever paid attention to what you are paying attention to? I’d like to recommend that you give it a try or at least think about it.
I came across the above Dallas Willard quote recently and well, it caught my attention and I began to wonder — what is the connection between love and attention?

Let’s start with some thoughts on attention.
Attention is defined as “the regarding of someone or something as interesting or important.”
What I’ve discovered in my wonderings about attention is that my attention is constantly being vied for from my phone, billboards (such is life in LA), ads on TV and social media, as well as a host of other places. Images are screaming at me to “regard them as interesting or important”. As you are probably aware, soon after the rise of the internet, the smartphone, and social media, we began to hear of terms like “attention economy” and “distraction addiction”. This is the world we now live in.
Now, what about love?
As a follower of Jesus, I am to be growing into a person of love like Jesus. The greatest commandment is to love God and love my neighbor as myself (Matthew 22:37-40). And there’s more!
“A new commandment I give to you, that you love one another: just as I have loved you, you also are to love one another.”
“Beloved, if God so loved us, we also ought to love one another.”
“And above all these put on love, which binds everything together in perfect harmony”
Now some thoughts on using our attention to love God and others. First, I need to be paying attention to God. Some ways that come to mind is through prayer, praise, and reading the Bible. What about loving others? Jesus modeled love by means of attention to all and every kind of people. When we pay attention to people, it is an act of love, because even without words, we are communicating that they are important.
In conclusion, by being intentional with our attention, we can bring more love into our relationships, our homes, our communities, and our world. I hope you will join me today in taking this small step to make the world a better place simply by the giving of your and my attention.

The Best Christmas Books for Young Kids
We’re rounding up our favorite Christmas reads to share with our young bookworms this season!
We love bringing books into our home based on seasonal topics - oceans and sea creatures in the summer, love and friendships for Valentine’s day, pumpkins and bats and spiders for fall, and Christmas books for the last month of the year.
We’ve rounded up our favorite Christmas books for our the most wonderful time of the year. Some we’ve had since I (Alisa) was little and some we’ve added to our collection in recent years.
Keep reading for links to buy each book and a little description of each and why we love them for our young kids.

Here are some of our favorites from PaperPie Books:
‘Twas the Night Before Christmas Pop-Up - this is the classic tale we all know and love, with beautifully illustrated pop-up pictures! We love being able to pass down timeless Christmas stories, and this book from PaperPie brings this classic to life for young kids with fun pop-ups on every page.
The Twinkly, Twinkly Christmas Tree and Twinkly, Twinkly Nativity - both of these books light up story time with bright LED lights! The first is a story about searching for Christmas lights and the second is about the beautiful stars in the sky at the time of Jesus’ birth. These make bedtime reading so magical!
The Nutcracker Sound Book - I grew up listening to the musical score from the Nutcracker every year during Christmas and attended the ballet as well! So this book is so special for me to share with my kids — they get to experience the sounds of the Nutcracker right along with the story.
Peek Inside the Nativity - the story of Jesus’ birth becomes a delight to read with beautifully cut out holes to see through each page. Peek at animals hiding in the stable or spy innkeepers watching over their inn. So much joy and mystery to experience in this story about the true meaning of Christmas.

Some more favorites from other publishers:
Mr. Willowby’s Christmas Tree - I (Alisa) LOVED this book as a child. I don’t necessarily know what drew me in with this story, but I was so delighted to read about this grand Christmas tree that Mr. Willowby bought. His tree is too tall for this house, so he chops off the top. Someone finds it, but it’s too tall for their space as well. And on it goes down through bears and foxes and rabbits and mice. This one Christmas tree winds up blessing so many little families - what a Christmas joy!
Rudolph the Red-Nosed Reindeer - it wouldn’t be Christmas without this classic to read and sing about! We have this edition from A Little Golden Book with the cutest vintage illustrations. Any edition would be lovely to add to your Christmas shelf!
Together—I absolutely fell in love with this book, which highlights the beauty of spending time together above receiving gifts during the Christmas season. That’s truly what it’s about, right? Family time, laughter shared, cookies baked, and memories made. I love the simple reminder of presence and family in this book.
Where’s Santa Claus? - this lift-the-flap board book is perfect for babies and toddlers. It has soft, felted flaps and fun illustrations. It would make the perfect stocking stuffer!
*note- I’ve linked all of these to Amazon, but we highly recommend shopping secondhand for books or supporting your local bookstore!
If your Christmas books aren’t already out, we hope you find a fun book to bring home and read with your kids this season! Snuggle up by the fire, grab some hot cocoa, and soak in the memories of reading with your little ones.